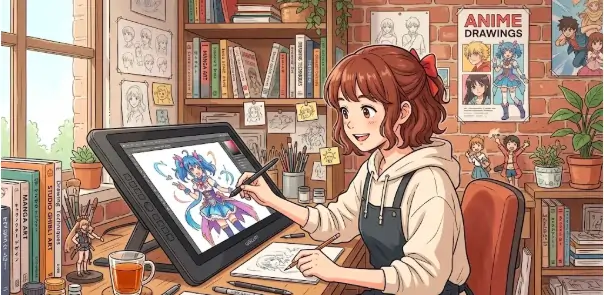
How to Start Anime Drawings: Beginner to Pro Guide
How to Start Anime Drawings: A Complete Guide for Beginners to Advanced Artists
Introduction
You want to draw anime but every attempt looks off. The eyes feel wrong. The proportions seem awkward. You keep starting over. This happens to every beginner — and it has a real fix. Anime drawings follow specific rules of proportion, line weight, and expression. Once you understand those rules, your art transforms. This guide breaks down everything from first sketches to advanced shading, so you stop guessing and start improving.
What Makes Anime Drawings Different from Other Art Styles
Anime drawings are not just cartoons with big eyes. They follow a structured visual language rooted in Japanese animation and manga culture.
The style uses simplified anatomy, exaggerated facial features, and expressive linework to communicate emotion quickly and clearly. Artists like Hayao Miyazaki and studios like Toei Animation built entire story worlds through these visual rules.
Key differences from Western cartoon styles include:
- Larger, more detailed eyes that carry emotional weight
- Smaller noses and mouths relative to face size
- Stylized hair with distinct volume and movement
- Clean, confident ink lines with minimal texture shading
- Proportional bodies that range from chibi (small/cute) to realistic depending on the genre
Understanding these differences helps you build the right foundation from the start.
The Basic Tools You Need to Start Anime Drawings
You do not need expensive tools to begin. Hundreds of professional anime artists started with a pencil and printer paper.
For traditional anime drawings:
- HB and 2B pencils for sketching
- A fine-line black pen (0.3mm or 0.5mm) for inking
- Smooth sketchbook paper (at least 90gsm)
- Kneaded eraser for clean corrections
- Ruler for panel layouts and perspective guides
For digital anime drawings:
- Drawing tablet (Wacom Intuos is a reliable beginner choice)
- Software like Clip Studio Paint, Procreate, or even free tools like Medibang Paint
- Reference folders organized by expression, pose, and clothing type
Clip Studio Paint remains the industry standard for digital anime art because of its vector tools and animation support. Many professional illustrators and manga creators use it daily.
How to Draw Anime Eyes: The Feature That Defines the Style
Eyes are the most recognized part of any anime drawing. Get them right and the whole face starts working.
Start with a flat horizontal line as your base. Anime eyes sit wider apart than realistic eyes — roughly one eye-width apart at the center.
Basic anime eye construction:
- Draw a thick upper lash line (curved, slightly angled inward)
- Add the iris as a large oval, partially hidden behind the upper lash
- Place a small pupil inside the iris
- Add one or two white highlight spots (top-right and bottom-left work well)
- Draw a thinner lower lash line beneath the iris
- Add upper and lower eyelashes as short angular strokes
Female anime eyes tend to be rounder and larger. Male anime eyes are often narrower and sharper. Practice both because character design demands range.
Understanding Anime Face Proportions
Wrong proportions kill good anime drawings before they start. Proportion is the skeleton everything else hangs from.
Use the guideline method every time you sketch a new face:
- Draw an oval or circle for the skull base
- Add a jaw line that narrows and comes to a soft point (more angular for older/serious characters)
- Divide the face horizontally in half — eyes sit at or just below this line
- Place the nose roughly halfway between eyes and chin
- Place the mouth roughly halfway between nose and chin
- Ears align with the eye-to-nose zone on the side of the head
For a three-quarter view (the most common anime angle), shift your guidelines slightly to one side. The far eye appears smaller and the nose crosses the center line.
Practice this structure on 20 blank faces before adding any detail. Proportion muscle memory saves hours later.
How to Draw Anime Hair That Looks Natural and Dynamic
Anime hair is one of the most stylized elements in the whole drawing style. It moves like fabric, groups into clumps, and ignores gravity in interesting ways.
Think of anime hair in three zones:
- The root zone: Where hair connects to the scalp — draw this as a clean curved line following the skull
- The body zone: The main volume of hair — simplified into large grouped shapes, not individual strands
- The tip zone: Where hair ends in pointed or blunt shapes depending on the character’s design
For flowing or wind-blown hair, add curved motion lines and split the tips outward. For straight hair, keep the lines parallel and let tips fall in consistent directions.
Avoid drawing every strand. Real anime art groups hair into shapes. That grouping is what makes it look intentional rather than messy.
Anime Body Proportions: From Chibi to Realistic Styles
Body proportions in anime vary drastically by genre and target audience. Knowing which proportion system fits your character matters.
Common anime proportion systems:
| Style | Head-to-Body Ratio | Common Usage |
| Chibi | 1:2 or 1:3 | Comedy, cute characters, merchandise |
| Shounen/Shoujo | 1:6 to 1:7 | Action, romance, standard manga |
| Seinen/Josei | 1:7 to 1:8 | Mature, realistic storylines |
| Moe | 1:5 to 1:6 | Slice-of-life, fan art styles |
| Bishounen | 1:8+ | Elegant male characters, fantasy |
For beginners, start with the 1:6 ratio. It is forgiving on proportional errors while still looking recognizably anime.
Use a unit system where one head height equals one unit. Stack those units downward to check your full figure proportions every time.
Line Art Techniques That Make Anime Drawings Look Professional
Weak lines make strong designs look amateur. Line confidence is a skill you build deliberately.
Line weight variation is essential. Thick lines on outer edges and shadow areas, thin lines for interior details and soft features — this contrast creates depth without shading.
Key lineart habits to build:
- Draw lines in single, confident strokes instead of sketching back and forth
- Use your whole arm for long curves, not just your wrist
- Slow down at the beginning and end of each stroke for cleaner control
- Keep inking pens moving at consistent speed to avoid wobble
- Lift the pen cleanly at line ends rather than tapering off randomly
Digital artists should use stabilization settings (called “correction” in Clip Studio Paint) to smooth out hand tremor while learning. Lower the stabilization as your confidence grows.
Shading Anime Drawings: Cel Shading vs. Soft Shading
Shading transforms flat anime drawings into dimensional characters. Two main methods dominate the style.
Cel shading uses hard-edged shadow shapes with no gradient. This comes from traditional animation where each frame was painted by hand with flat colors. It looks clean, graphic, and very true to classic anime aesthetics. Study works from Studio Ghibli and early Naruto to see cel shading done expertly.
Soft shading blends shadow edges using airbrush or blur tools. It creates a more painterly, modern feel. Artists producing webtoon art or digital illustration portfolios often prefer this method.
For beginners, start with cel shading. It teaches you to think about light sources clearly because every shadow shape requires a deliberate decision. Once you understand light logic, soft shading becomes easier to control.
Always define your light source before adding any shadow. One light source, consistent angle, every time.
How to Practice Anime Drawings and Improve Faster
Random practice produces random results. Structured practice builds real skill.
The most effective practice methods:
- Gesture drawing (5–10 minutes daily): Use sites like Line of Action or SenshiStock to practice loose figure poses. Speed forces you to capture the essential shape instead of overworking details.
- Copy professional work: Choose one panel from a manga or one frame from an anime series. Recreate it exactly. This teaches you how skilled artists make decisions.
- Design original characters: Apply what you copy to something new. Original work forces you to solve problems instead of following someone else’s answers.
- Draw from imagination, then compare: Draw a face from memory, then pull a reference and find the gap. That gap shows you exactly what to practice next.
Aim for consistent daily sessions over long occasional ones. Thirty minutes daily beats three hours on weekends.
Common Mistakes Beginners Make in Anime Drawings
These specific errors appear in almost every beginner’s work. Knowing them helps you fix them faster.
Symmetry obsession: Anime faces are not perfectly symmetrical. Slight asymmetry makes characters feel alive. Forcing perfect mirror images flattens expression.
Floating hair: Hair sits on a skull. When the skull moves or tilts, hair responds. Draw the skull first, then place hair on top of it.
Stiff poses: Straight-line spines produce robot-like figures. Real bodies have a natural curve called the line of action. Build every pose around a flowing S or C curve first.
Ignoring reference: Even professional anime artists use reference images constantly. Using reference is not cheating — it is research.
Overworking sketches: More lines do not equal better art. Simplify. The most powerful anime drawings use fewer, more intentional marks.
Anime Drawing References and Communities Worth Following
Learning from a community accelerates growth far faster than working alone.
Reliable resources and communities:
- Clip Studio Tips (tips.clip-studio.com) — Tutorial library from actual professional illustrators
- Sakimi Chan on Patreon — One of the most studied digital anime artists working today, known for detailed character illustration
- r/learnart and r/manga on Reddit — Active communities with critique threads and resource sharing
- ArtStation — Professional portfolio platform where anime concept artists from gaming and animation post work
- Croquis Cafe on YouTube — Free gesture drawing sessions useful for building figure drawing foundations
Cross-reference multiple sources. No single teacher covers everything, and seeing different artists solve the same problems teaches you that multiple correct approaches exist.
FAQs About Anime Drawings
Q: How long does it take to get good at anime drawings?
Most people see noticeable improvement within 3 to 6 months of daily practice. Reaching a confident intermediate level typically takes 1 to 2 years of consistent, structured work. Progress depends heavily on focused practice quality, not just hours spent.
Q: Can I learn anime drawings without any art background?
Yes. Anime drawing is a learnable skill set, not a natural talent. Proportion guidelines, eye construction, and line techniques are rules anyone can follow. Starting with zero experience is normal, and the structured nature of the anime style actually makes it more beginner-accessible than realistic drawing.
Q: What is the best software for digital anime drawings?
Clip Studio Paint is the most widely recommended choice among professional anime and manga artists. It offers vector tools, panel layouts, and dedicated brush types suited to the style. Procreate on iPad works well for artists who prefer mobile drawing. Medibang Paint is a solid free alternative for absolute beginners.
Q: Should I learn to draw realistically before trying anime drawings?
Basic proportion understanding helps, but you do not need to master realism first. Learning anime drawing directly is a valid path. Many self-taught anime artists never focused on realism and still developed strong technical skills. Study the fundamentals of proportion, perspective, and light within the anime context rather than outside it.
Q: How do I develop my own anime drawing style?
Start by copying artists whose work you admire. Study what specific choices they make — eye shape, line weight, shading method, color palette. After copying several different artists, your own preferences will emerge naturally. Style develops from accumulated influences filtered through your personal taste and repetition.
Q: What paper is best for traditional anime drawings?
Smooth Bristol board or smooth cartridge paper (90–100gsm) works best for clean ink lines. Rough-textured paper causes ink to bleed and lines to look uneven. If you plan to scan and color traditionally drawn lineart, use bright white paper for cleaner digital editing afterward.
Build Your Anime Drawing Practice Starting Today
Anime drawings reward patience and structured effort. Every professional artist you admire started with awkward proportions and shaky lines — the same place you are right now.
Pick one skill from this guide. Work on it for one week before moving to the next. Eyes this week. Hair structure next. Face proportions after that. Layered learning builds stronger foundations than trying to fix everything at once.
Share your work online. Join a community. Accept critique and apply it. The artists who improve fastest are not the most talented — they are the most consistent and the most willing to be corrected.